I have a requirement in my current project that hide Next Stage, Set Active and Back button in the Business Process Flows
To do that, I used an UnSupported code code below
function hideBPFButton() {
    hideBPFButtons();
    window.addEventListener("resize", hideBPFButtons);
    Xrm.Page.data.process.addOnStageSelected(hideBPFButtons);
}

function hideBPFButtons() {
    var dom = (Xrm == undefined || Xrm.Internal == undefined || Xrm.Internal.isTurboForm() == undefined || Xrm.Internal.isTurboForm() == false) ? document : parent.document;
    $("#stageSetActiveActionContainer", dom).remove();
    $("#stageBackActionContainer", dom).remove();
    $("#stageNavigateActionContainer", dom).remove();
    setTimeout(function () { $("#processStagesContainer", dom).width(1894); }, 50);
}
In the form OnLoad, call function
hideBPFButton();
Before apply code
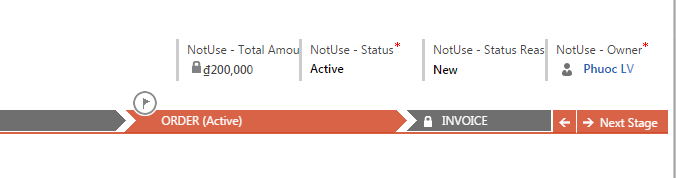
After apply code

How to code: change stage, set active
- Client side: check Xrm.Page.data.process and Xrm.Page.ui.process
- Server side: reference 3 fields: processid, stageid and traversedpath: in the entity record
The following code query processid by Process Name in the entity workflow
<fetch distinct="false" mapping="logical" output-format="xml-platform" version="1.0">
  <entity name="workflow">
    <attribute name="workflowid">
    <filter type="and">
      <condition attribute="type" operator="eq" value="1">
      <condition attribute="category" operator="eq" value="4">
      <condition attribute="name" operator="eq" value="yyyyyy">
    </filter>
  </attribute></entity>
</fetch>
The following code query stageid by processid and Stage Name in entity processstage
<fetch distinct="false" mapping="logical" output-format="xml-platform" version="1.0">
  <entity name="processstage">
    <attribute name="processstageid">
    <filter type="and">
      <condition attribute="processid" operator="eq" value="xxxxxx">
      <condition attribute="stagename" operator="eq" value="yyyyyy">
    </filter>
  </attribute></entity>
</fetch>
Checked, Tested work with CRM2016, CRM2016 SP1, CRM2016 Online
UnSupported code, use it with your own risk.